When setting up your Webhook integration, you have the option to send via Zapier if your system does not take a direct Webhook. In the example below, we will walk through how to send information to a Google Sheet in real-time with our Webhook Integration.

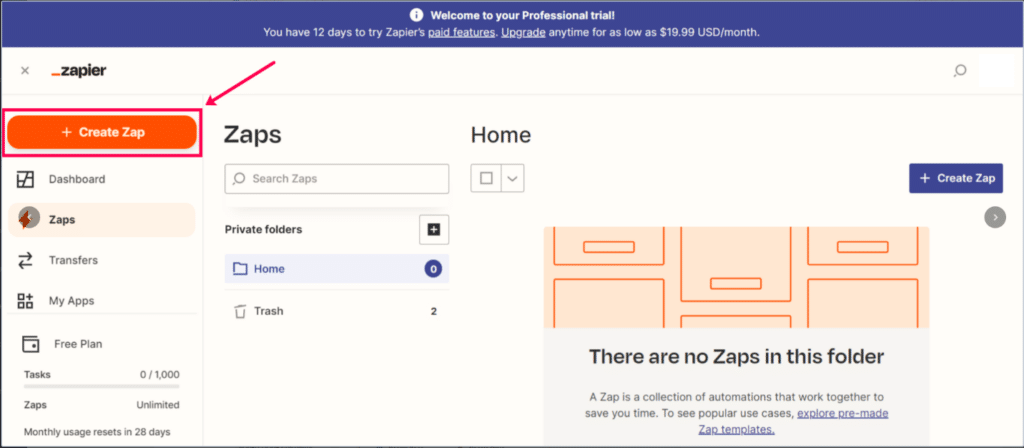
Step 1: Open Zapier in a new tab. Click Create Zap.
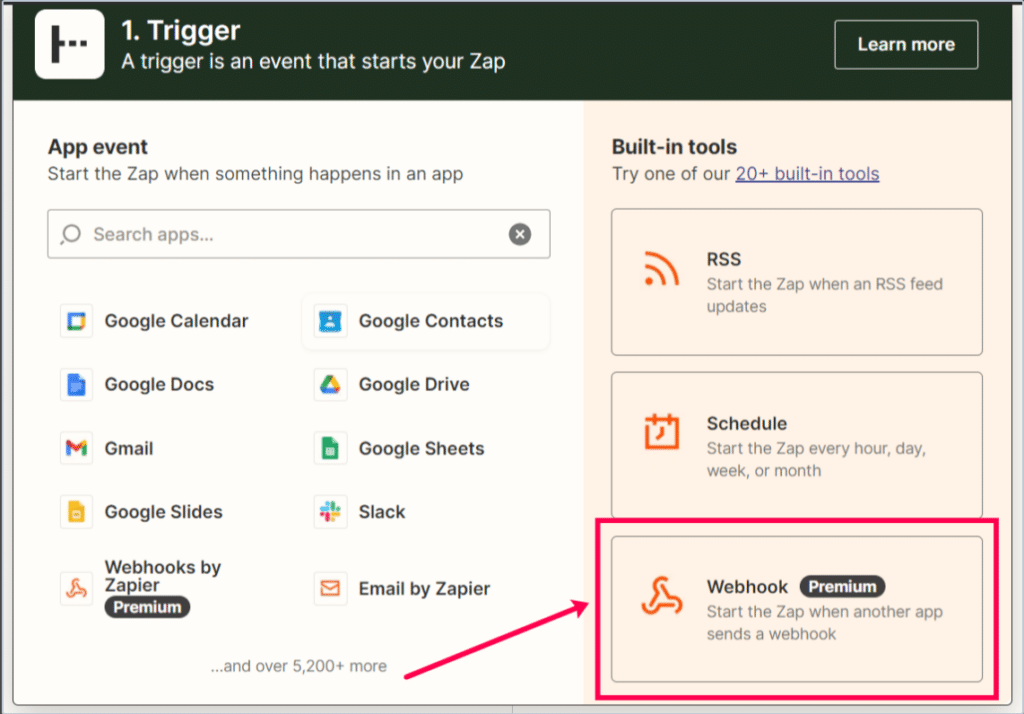
Step 2: Next, select Webhook on the right.
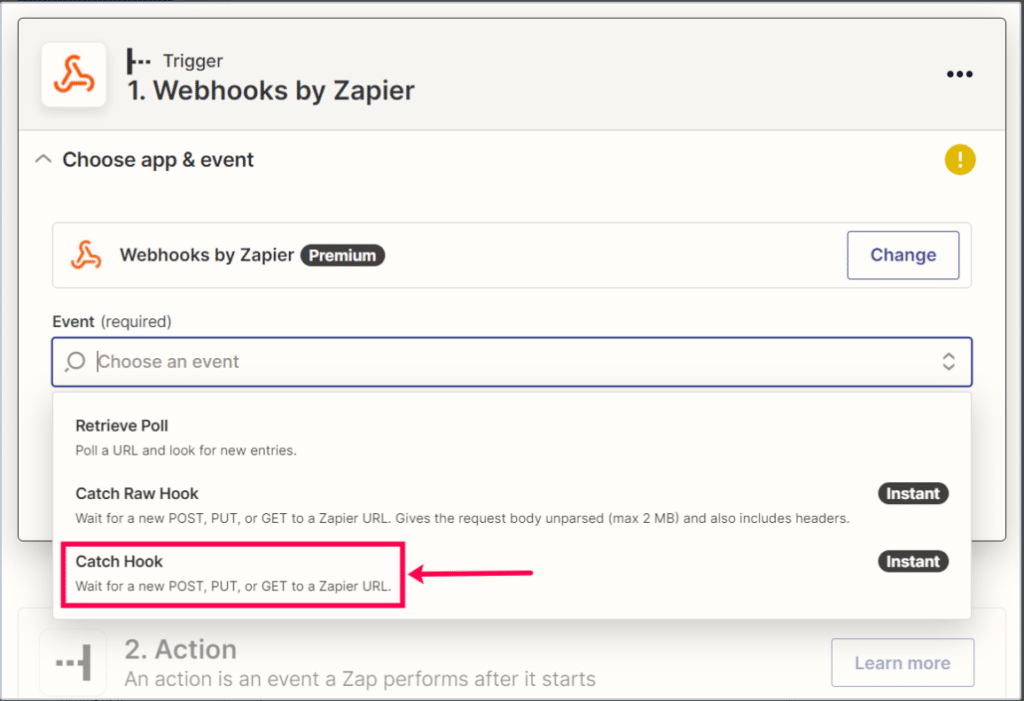
Step 3: For the ‘Event’, choose Catch Hook from the drop-down.
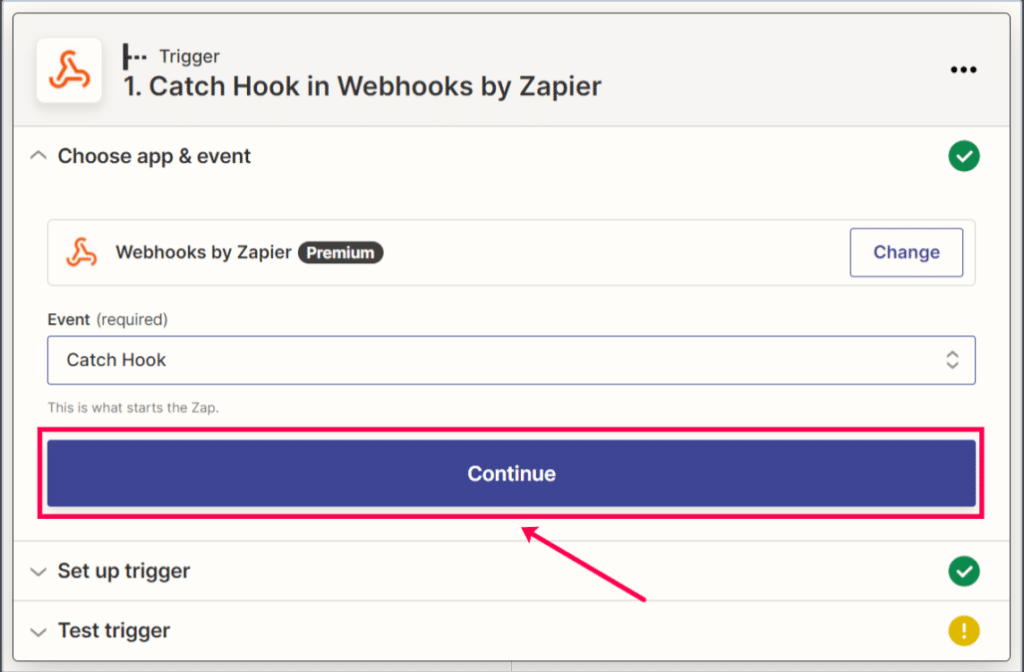
Step 4: Click Continue.
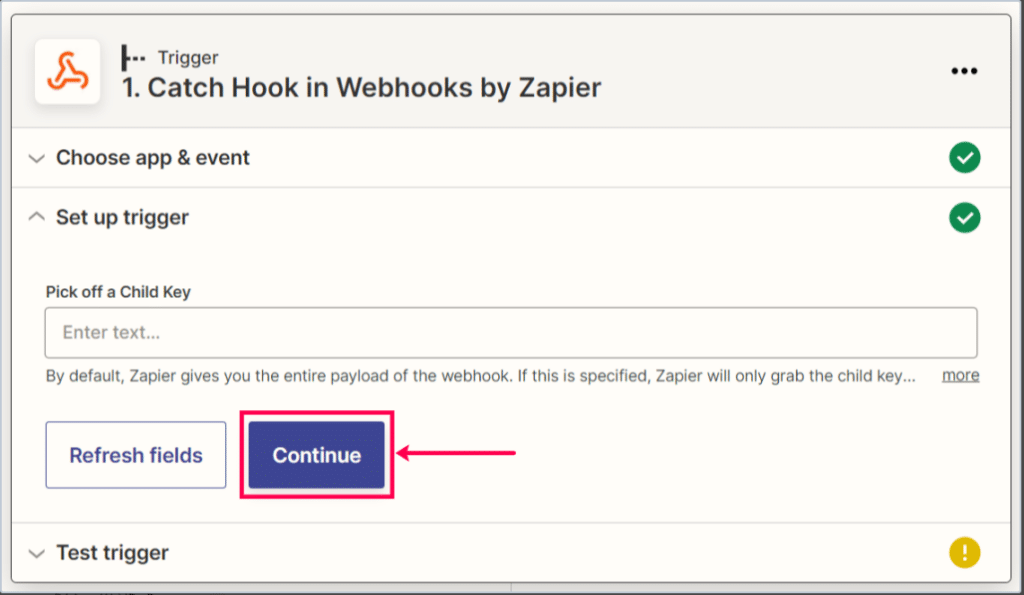
Step 5: Click Continue and bypass entering a Child Key.
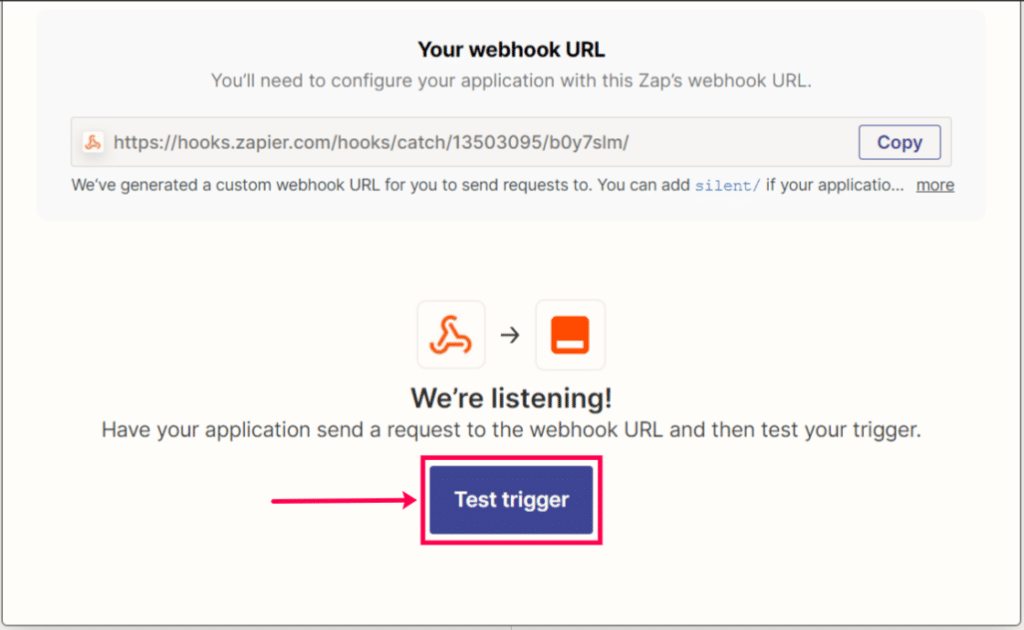
Step 6: Copy the link populated in the box, we will use this to connect to IDEX Pro.

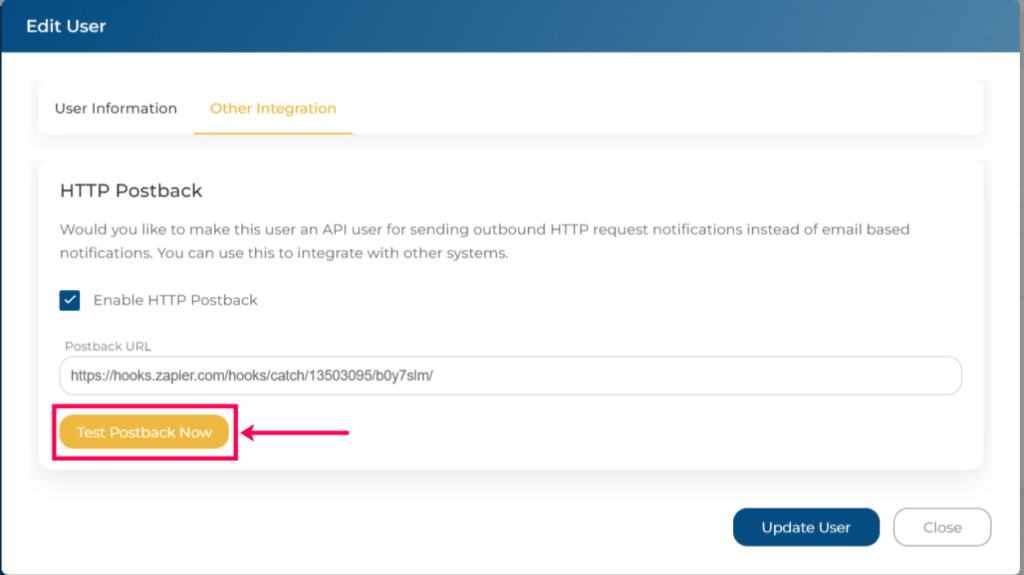
Step 7: Go back to the IDEX Pro app and ‘Edit’ the user for this integration. Check the box to enable Webhook and paste the link.

Step 8: Click Test Postback Now.
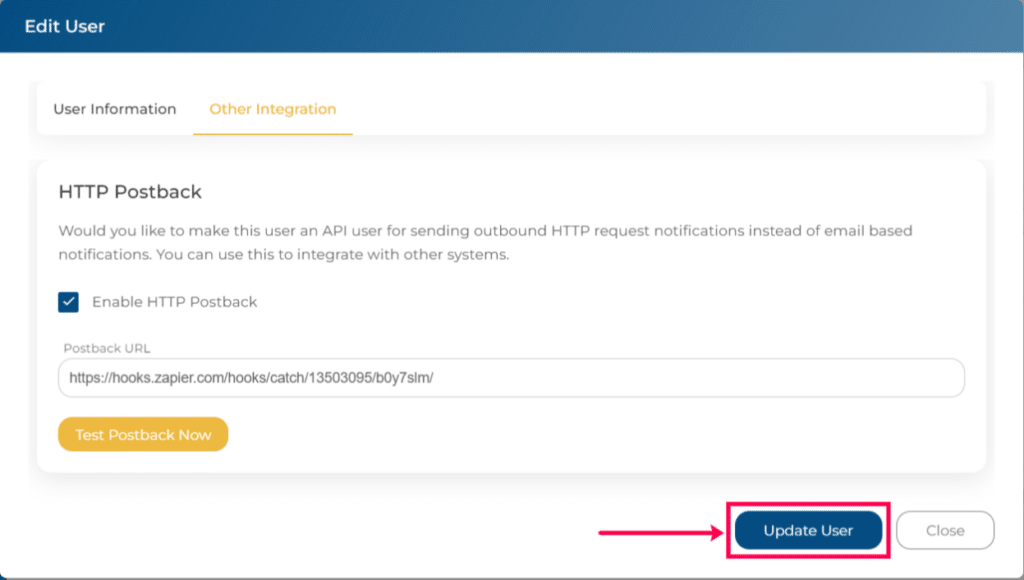
Step 9: Then Update User.
Step 10: Once updated, go back to Zapier and click Test Trigger.
Step 11: This will push test data over, Click Continue.

Step 12: Next, Choose your Action, and select Google Sheets.
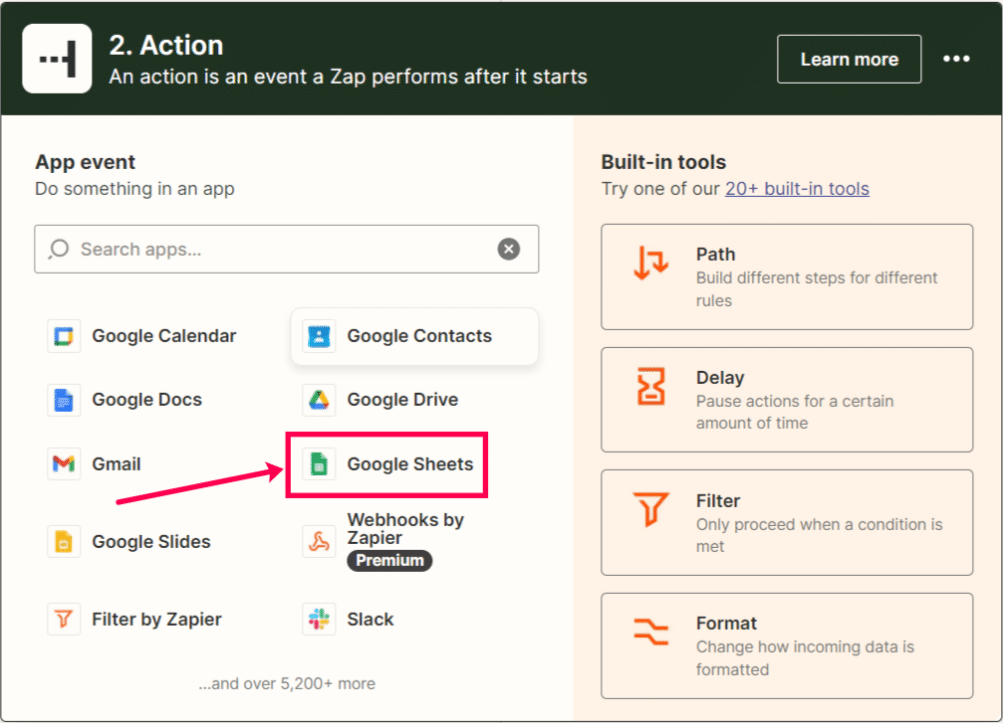
Step 13: For your event, choose to Create Spreadsheet Row(s).
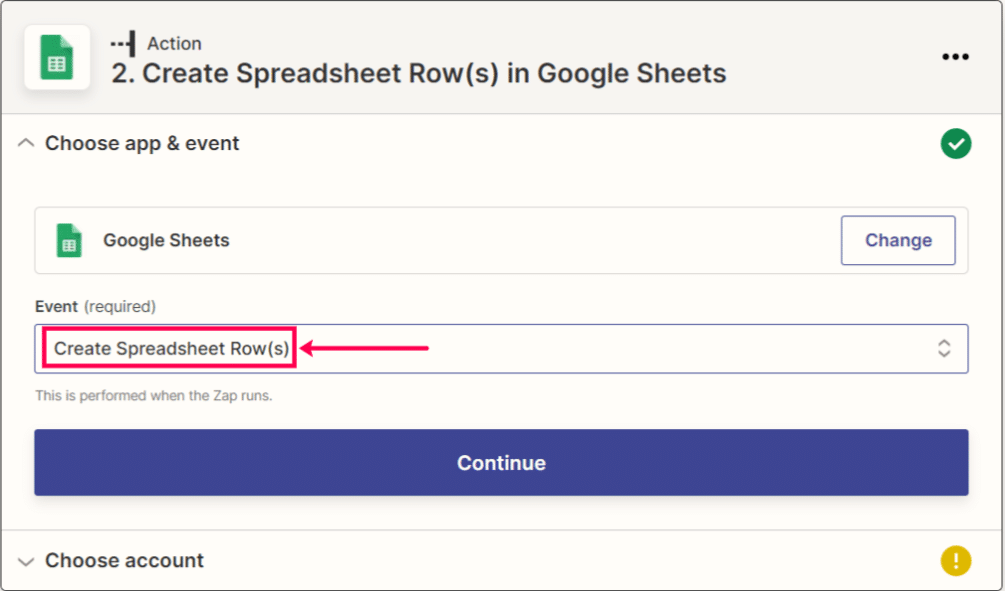
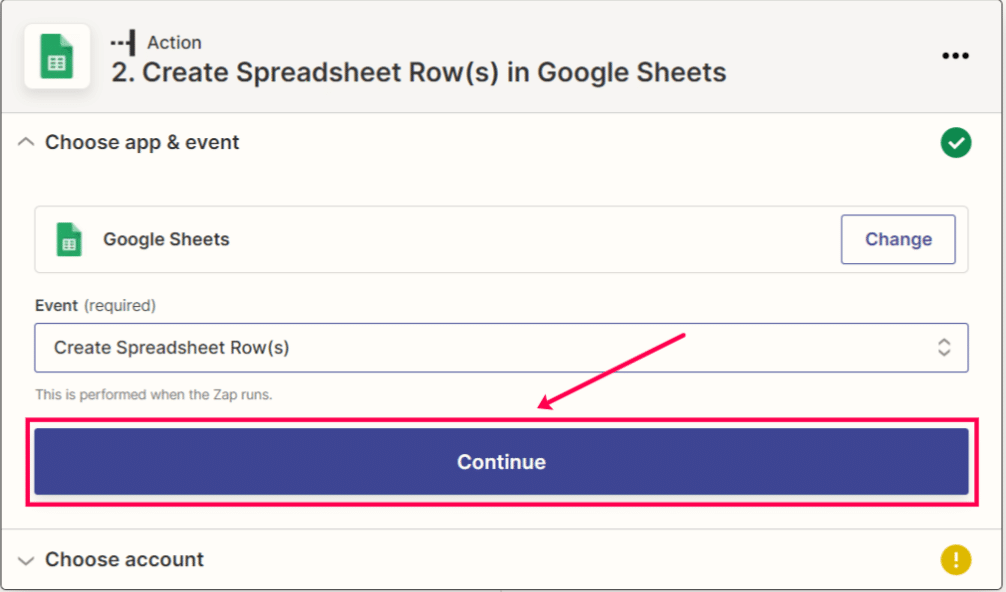
Step 14: Click Continue to move to select your account.
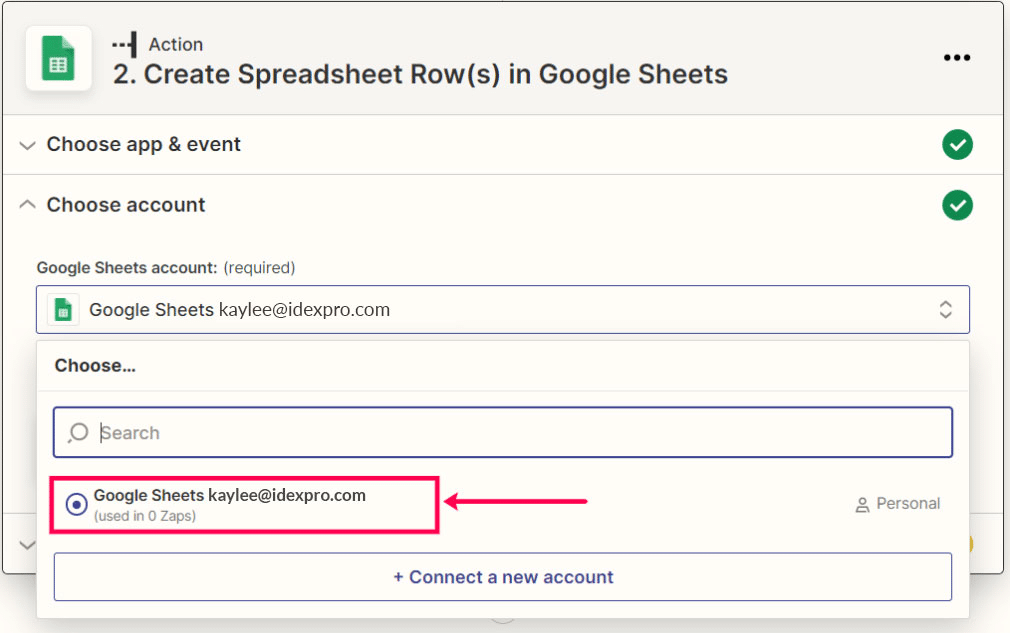
Step 15: Select your Google account (if you haven’t already linked your Google and Zapier, click “Connect a new account”).
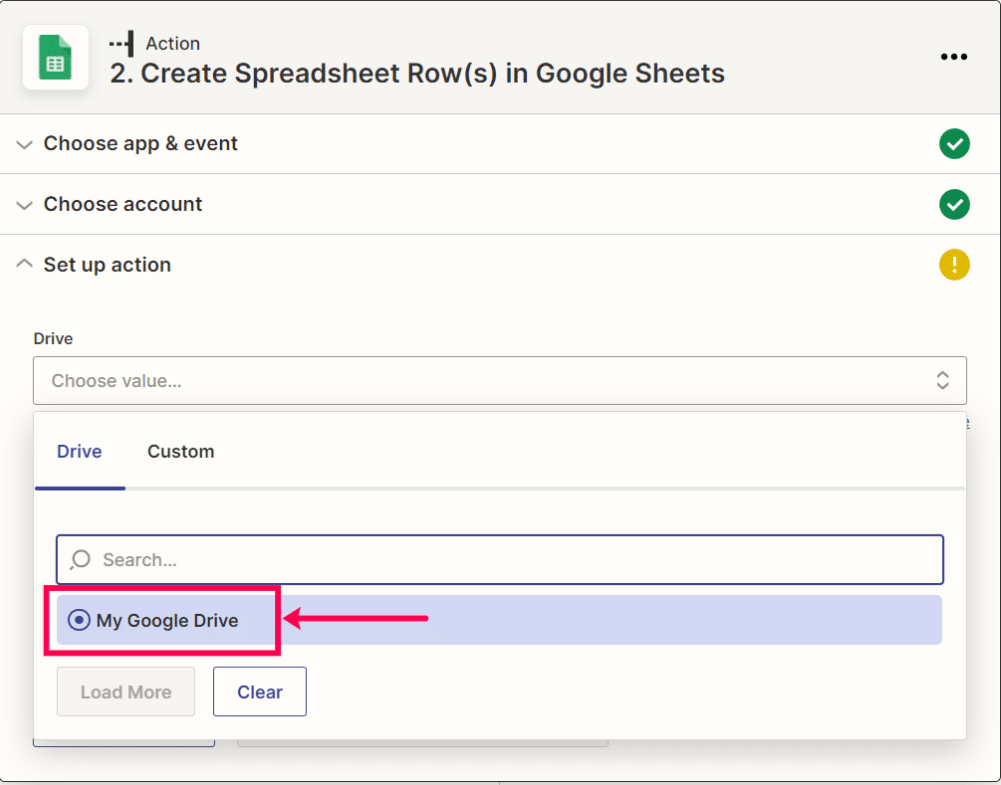
Step 16: Click My Google Drive.
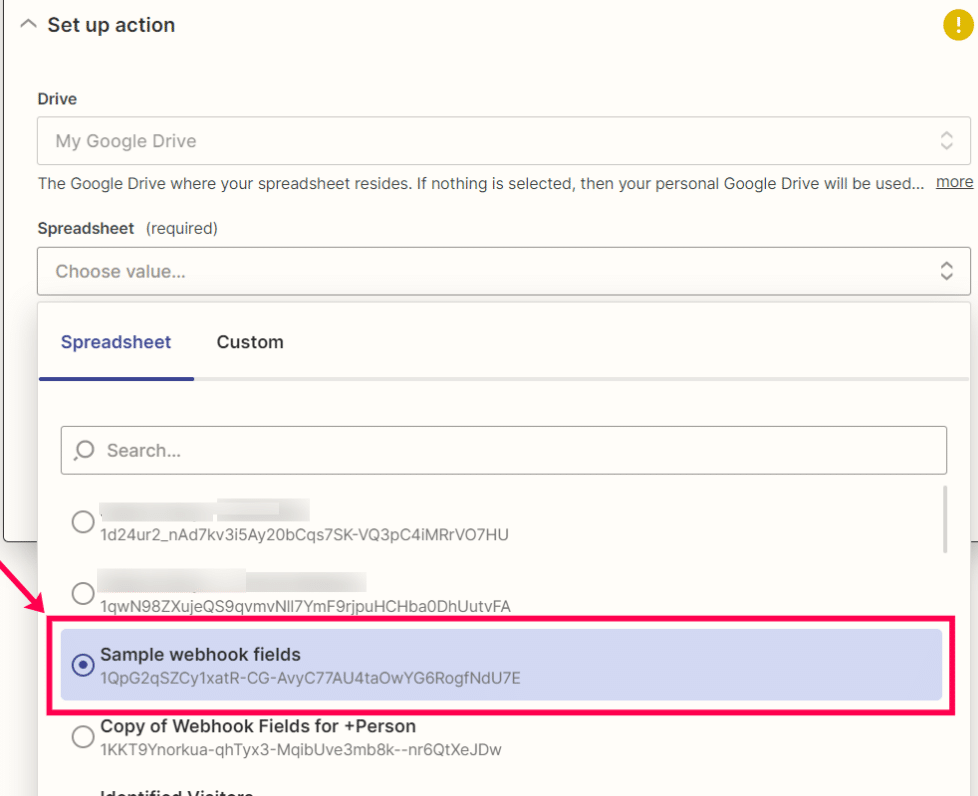
Step 17: Click on the spreadsheet with the desired fields. Note, you will want to create a Google Sheet and assign it column headers for the information you want to map.
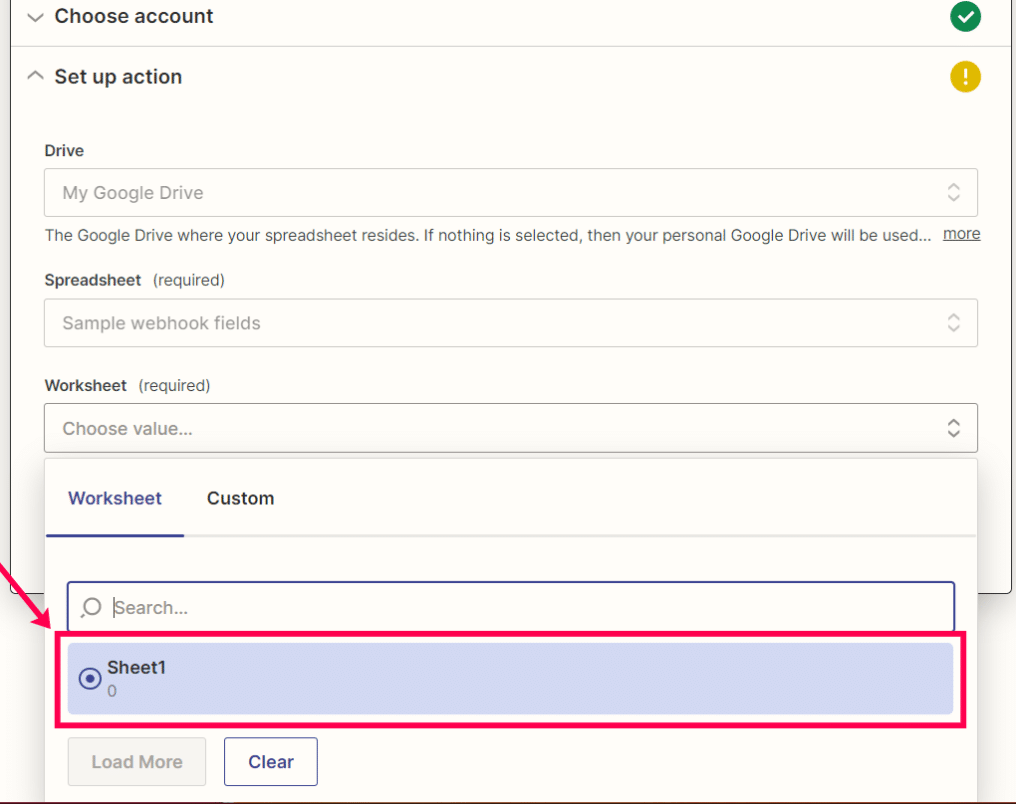
Step 18: Click Sheet 1.
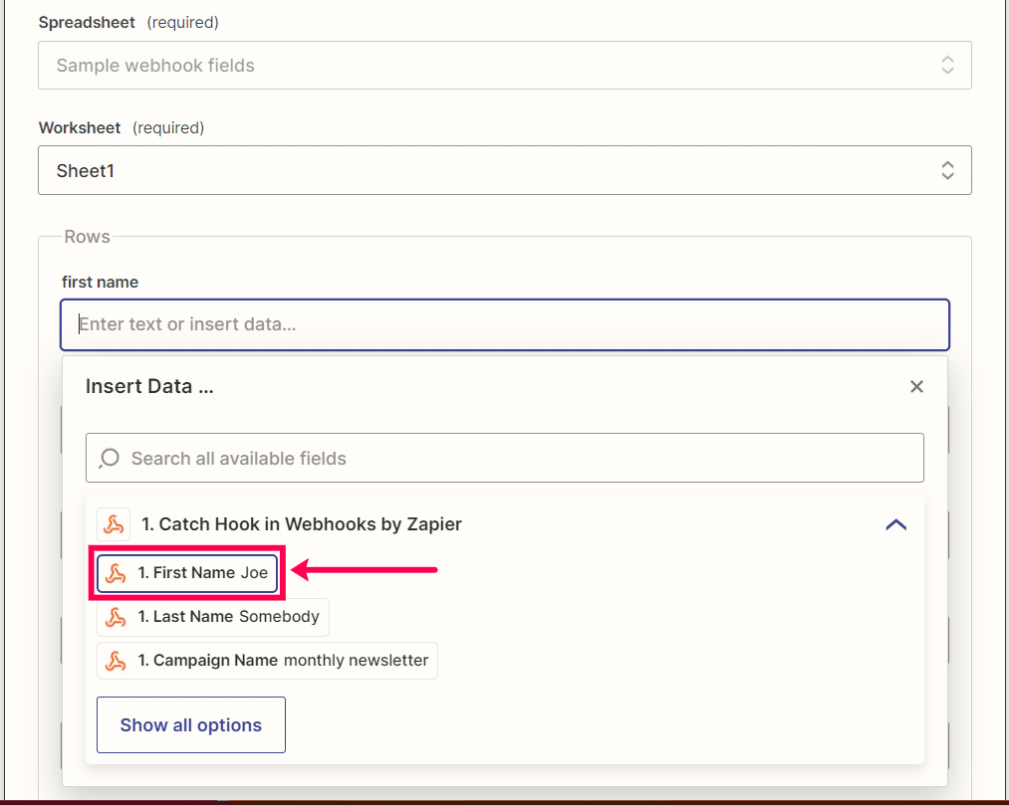
Step 19: To map the fields, simply click on the corresponding field (i.e. when it says First Name, click First Name from the menu).
Step 20: When you’re done mapping fields, hit Continue.
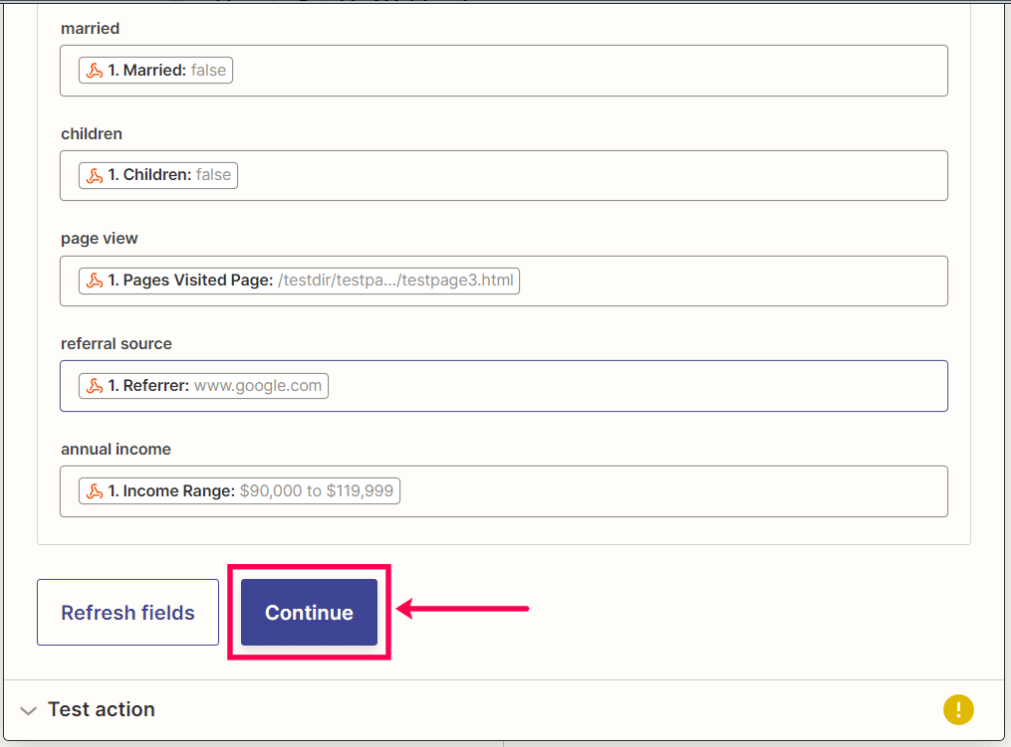
Step 21: Click Test and Continue.

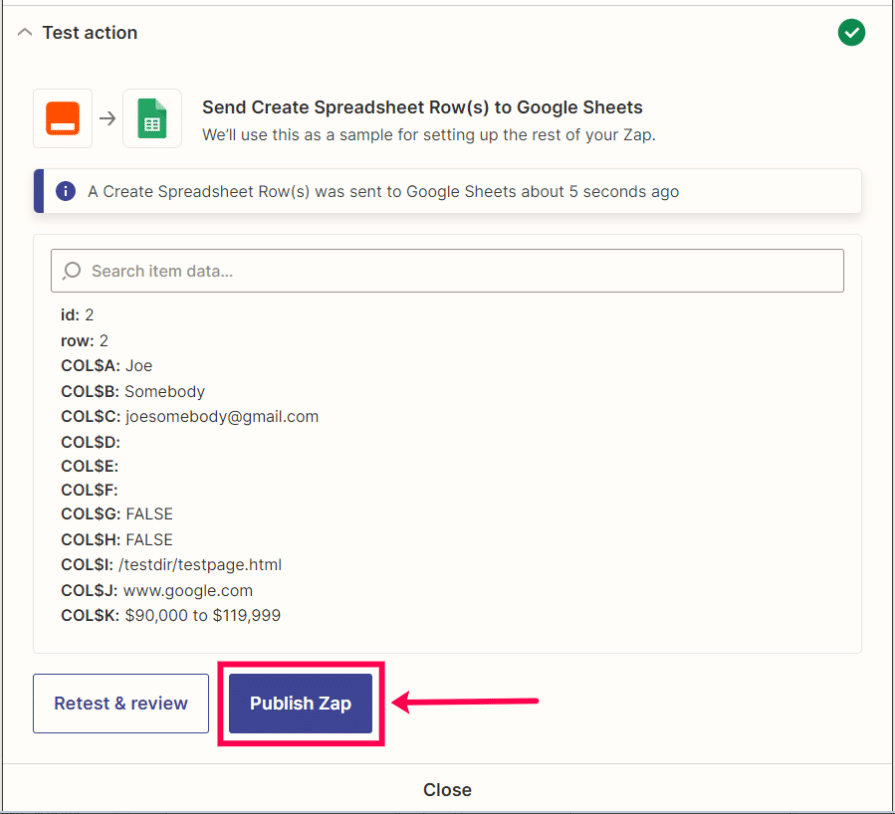
Step 22: Open the Google Sheet were you sent the data. If it successfully added the fields you mapped, you’re good to go. If not, review for errors, make changes, and then test again.
Step 23: When the test works, click Publish Zap. You’re done!
If you have any issues, contact Support for clarification.
