If your site does not already have a cookie banner, IDEX Pro offers free cookie consent banner configuration. You can turn this feature on or off at any time.
The important note to remember is that IDEX Pro will not operate in the absence of cookie consent.
How to Configure Your Cookie Consent Banner Inside of IDEX Pro.
Inside your dashboard, go to ‘Configuration -> Installation’.
In the Installation tab, you will have a pre-checked box down at the bottom. This box will say ‘Add Cookie Consent Banner to Script.’
Check the Cookie Consent box. You should notice a demo banner at the bottom of your screen. Take note of this for later.

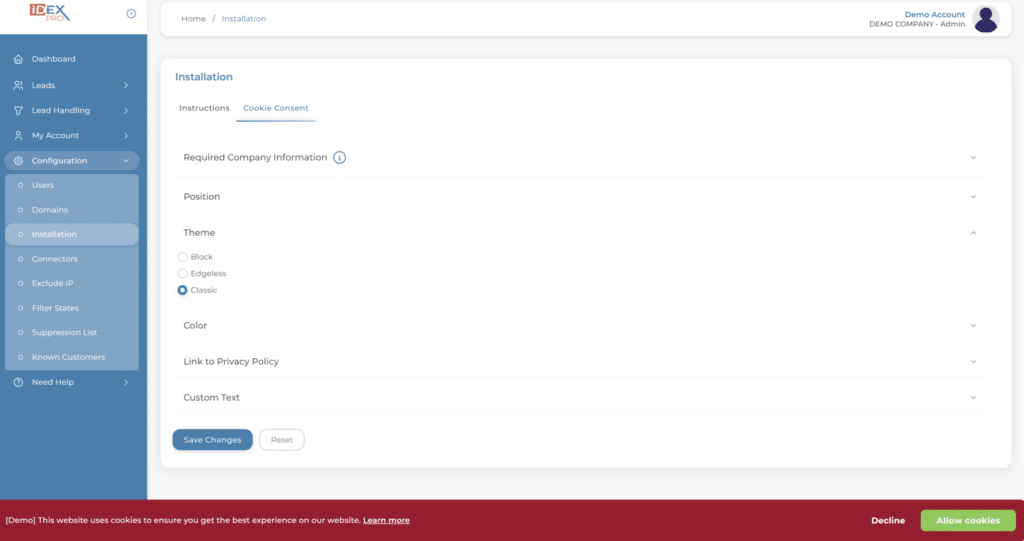
From here, you will select ‘Cookie Consent‘ next to ‘Instructions’ at the top.
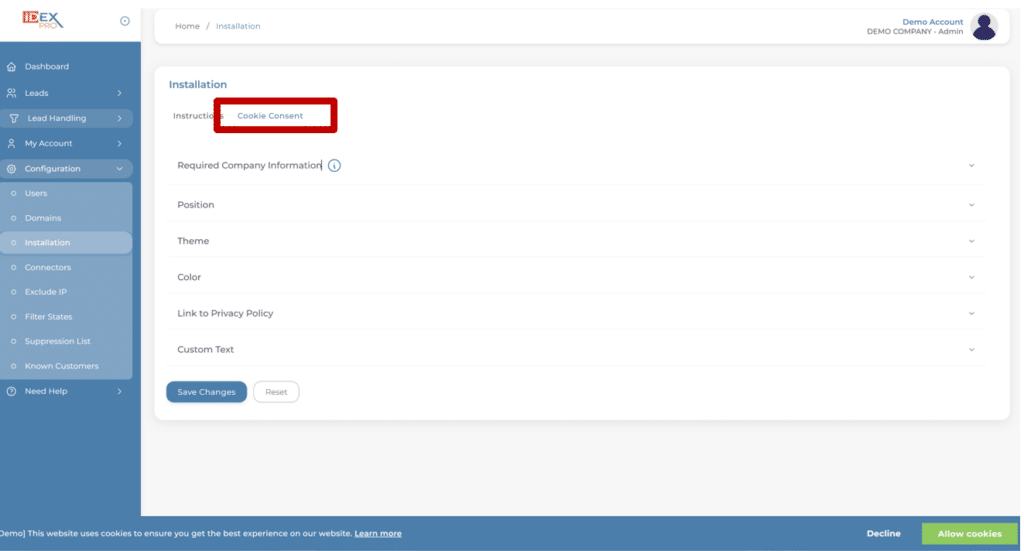
This will pull up a page where you can customize your cookie banner.
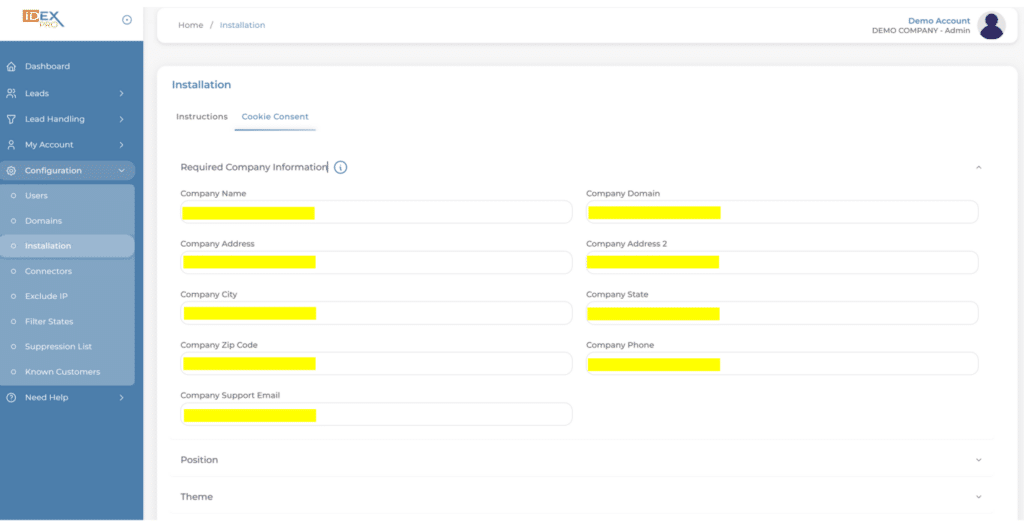
Step 1:
Fill out the Required Company Information. You must enter all of your company information as requested.
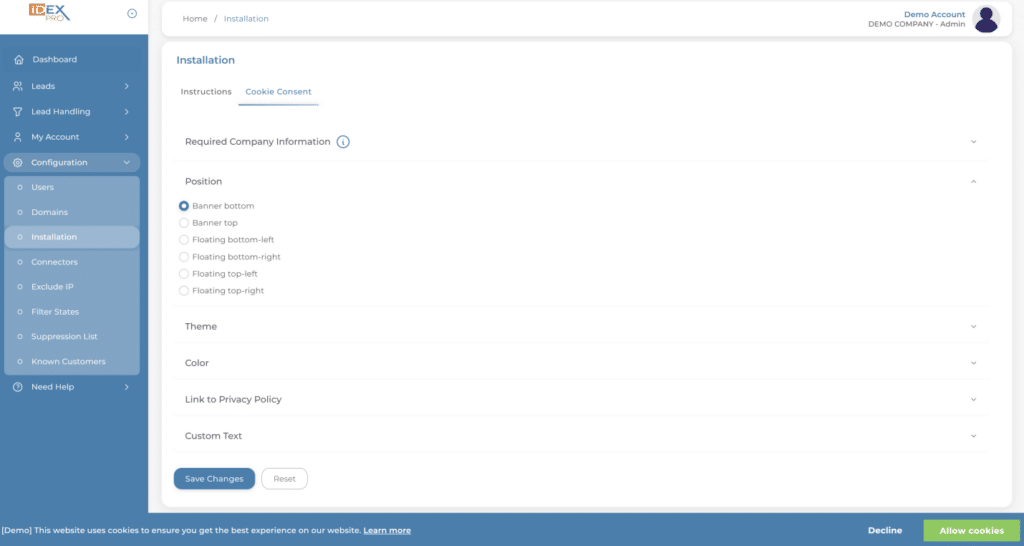
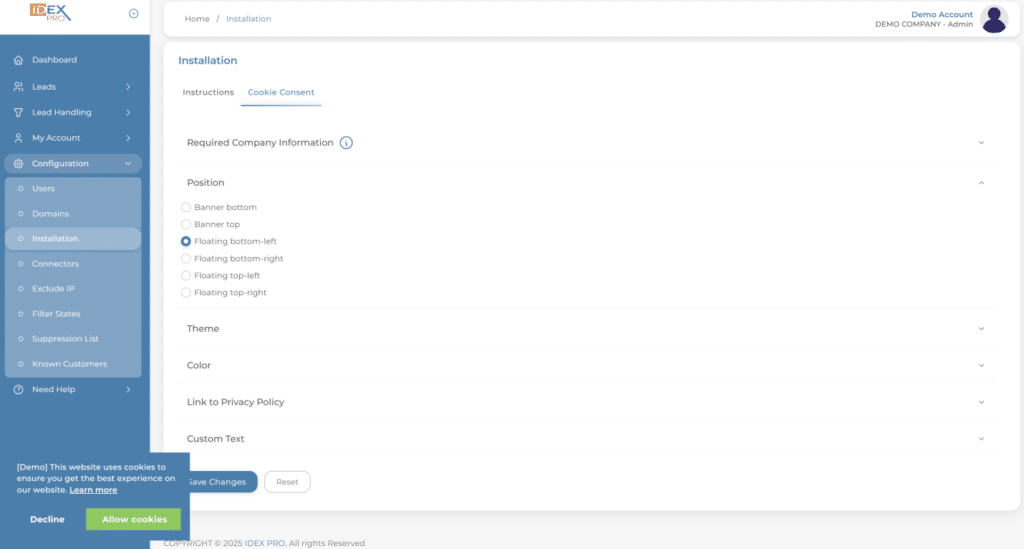
Step 2:
Your Position. Where would you like your cookies banner to show up on the screen? Remember the demo banner at the bottom of your screen? Whichever position you select, the demo banner that is at the bottom of your screen will change to the position selected. It is automatically set up for the Banner bottom.
Step 3:
Going down the line, you can change your Theme. This will change the look of your cookie consent button.

Notice how when selecting “classic,” the look of the banner changes slightly, with the biggest change being to the Accept button.

Step 4:
The Color tab changes the color of your cookie banner. You can use your color HSL, use your HEX codes, drag the scale, or RGB. This can match your website theme and company colors, or something totally different. Just click on the paint palette to choose your colors. The demo banner will change as you select different shades.
Step 5:
Privacy Policy. You can use our generic privacy policy, or you can use your own. To add your own, just add the link required.
Step 6:
Your Custom Text. This changes the default verbiage within the banner. Your Banner Message is the text displayed letting visitors know your website uses cookies. You can either leave our general message or create your own by checking the box and inserting your preferred text.

Your Privacy Policy Display Text is the link next to your banner message. This explains the cookie consent laws.
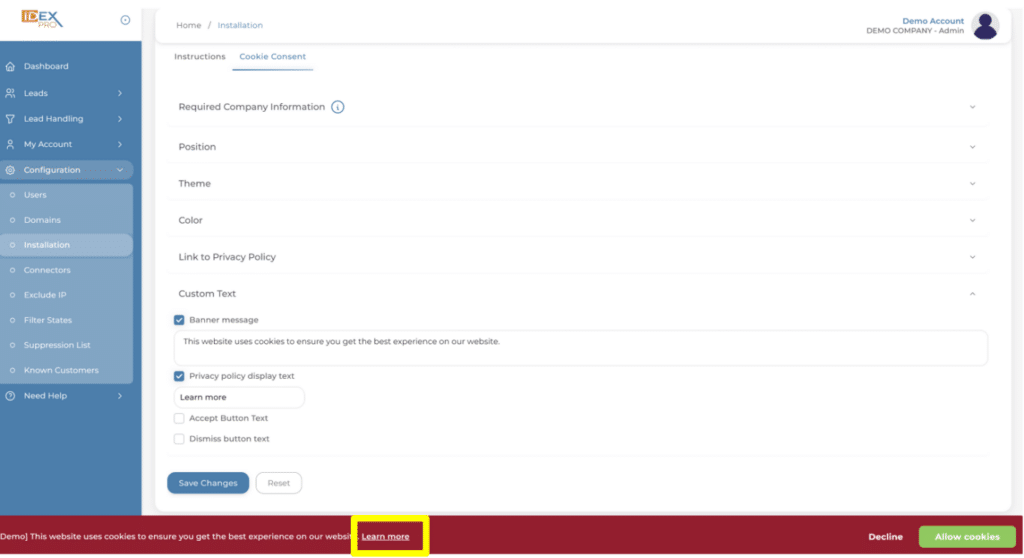
You can also change the verbiage for the Accept and Dismiss buttons, which are Decline and Allow Cookies on our screen. If you’re happy with the way everything looks, hit save.
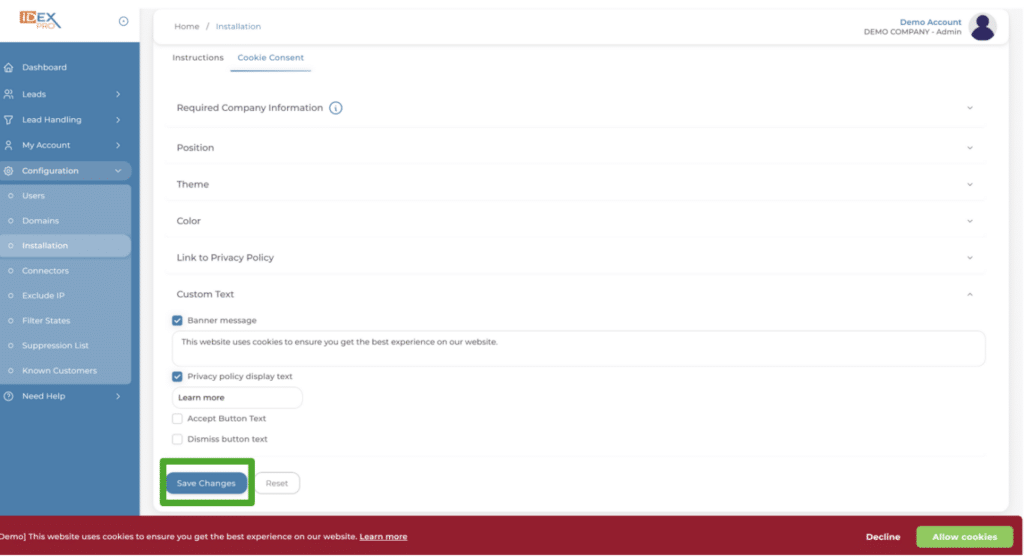
After you select Save Changes, you will see a green box in the upper right-hand corner, and you will have a box pop up in the middle of the screen. Select ‘close’ and your banner is ready.
Nothing else needs to be done here unless you are unhappy with the way something looks. In this case, you will adjust where it’s needed and save it when you’re done.